
Mastering Thread Repair: A Step-By-Step Guide For DIY Enthusiasts
Threaded fasteners are ubiquitous in both everyday objects and complex machinery. From furniture assembly to automotive repair, screws and bolts are integral components that hold things together. Over time, these threads can become damaged due to over-tightening, corrosion, or cross-threading. Learning how to repair threads not only saves time and money but also extends the life of your items.
This guide provides a comprehensive overview of thread repair, empowering you with the knowledge to tackle these issues confidently.

Understanding Threads
Threads are helical structures used to convert between rotational and linear movement or force. They are categorized as internal (female) or external (male) threads. Common types include metric, imperial, and pipe threads, each with specific standards and applications. The materials used in threaded fasteners range from metals like steel and aluminum to plastics. Understanding these basics is crucial for identifying the right tools and techniques for thread repair.
Recognizing damaged threads is the first step in the repair process. Symptoms include difficulty in screwing or unscrewing fasteners, loose fitting, and visible wear or deformation. The primary causes of damage are over-tightening, which stretches or breaks the threads; corrosion, which weakens the material; and cross-threading, where the fastener is improperly aligned.
Before diving into repairs, gather the necessary tools and materials:
- Thread Repair Kits: Helicoil and thread inserts are common solutions.
- Taps and dies: used to cut or restore threads.
- Thread Files: Handy for minor repairs.
- Cleaning Tools: Degreasers and brushes ensure a clean work area.
- Lubricants and Adhesives: Facilitate smooth threading and secure fasteners.
Preparation
Safety first: wear gloves and goggles to protect yourself from metal shavings and sharp tools. Ensure you have all the required tools and materials before starting the repair.
Cleaning the damaged area
Remove any debris, old lubricant, or corrosion from the damaged area. Use a degreaser and a brush to clean the threads thoroughly, ensuring they are dry before proceeding.
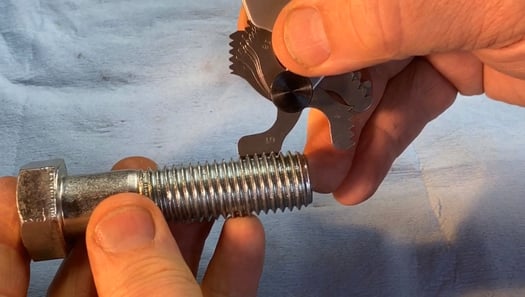
Assessing the damage
Measure the thread size and pitch using a thread gauge. Determine the extent of the damage to choose the appropriate repair method: helicoil, thread insert, or tap and die.
Repairing with Helicoil or Thread Inserts
- Drilling Out the Damaged Thread: If the thread damage is severe, you may need to drill out the existing thread. Use the drill bit provided in your thread repair kit to ensure the hole is the correct size for the insert.
- Tapping the Hole: Once the hole is drilled, use the tap from your kit to cut new threads into the hole. Ensure you apply cutting fluid to the tap to reduce friction and prevent overheating.
- Installing the Helicoil or Thread Insert: Insert the helicoil or thread insert into the newly tapped hole. Use the insertion tool to place it correctly. Ensure it sits flush with or slightly below the surface to avoid interference.
- Testing the New Thread: After installation, test the new thread by screwing in the appropriate bolt or screw. It should fit snugly without excessive force.
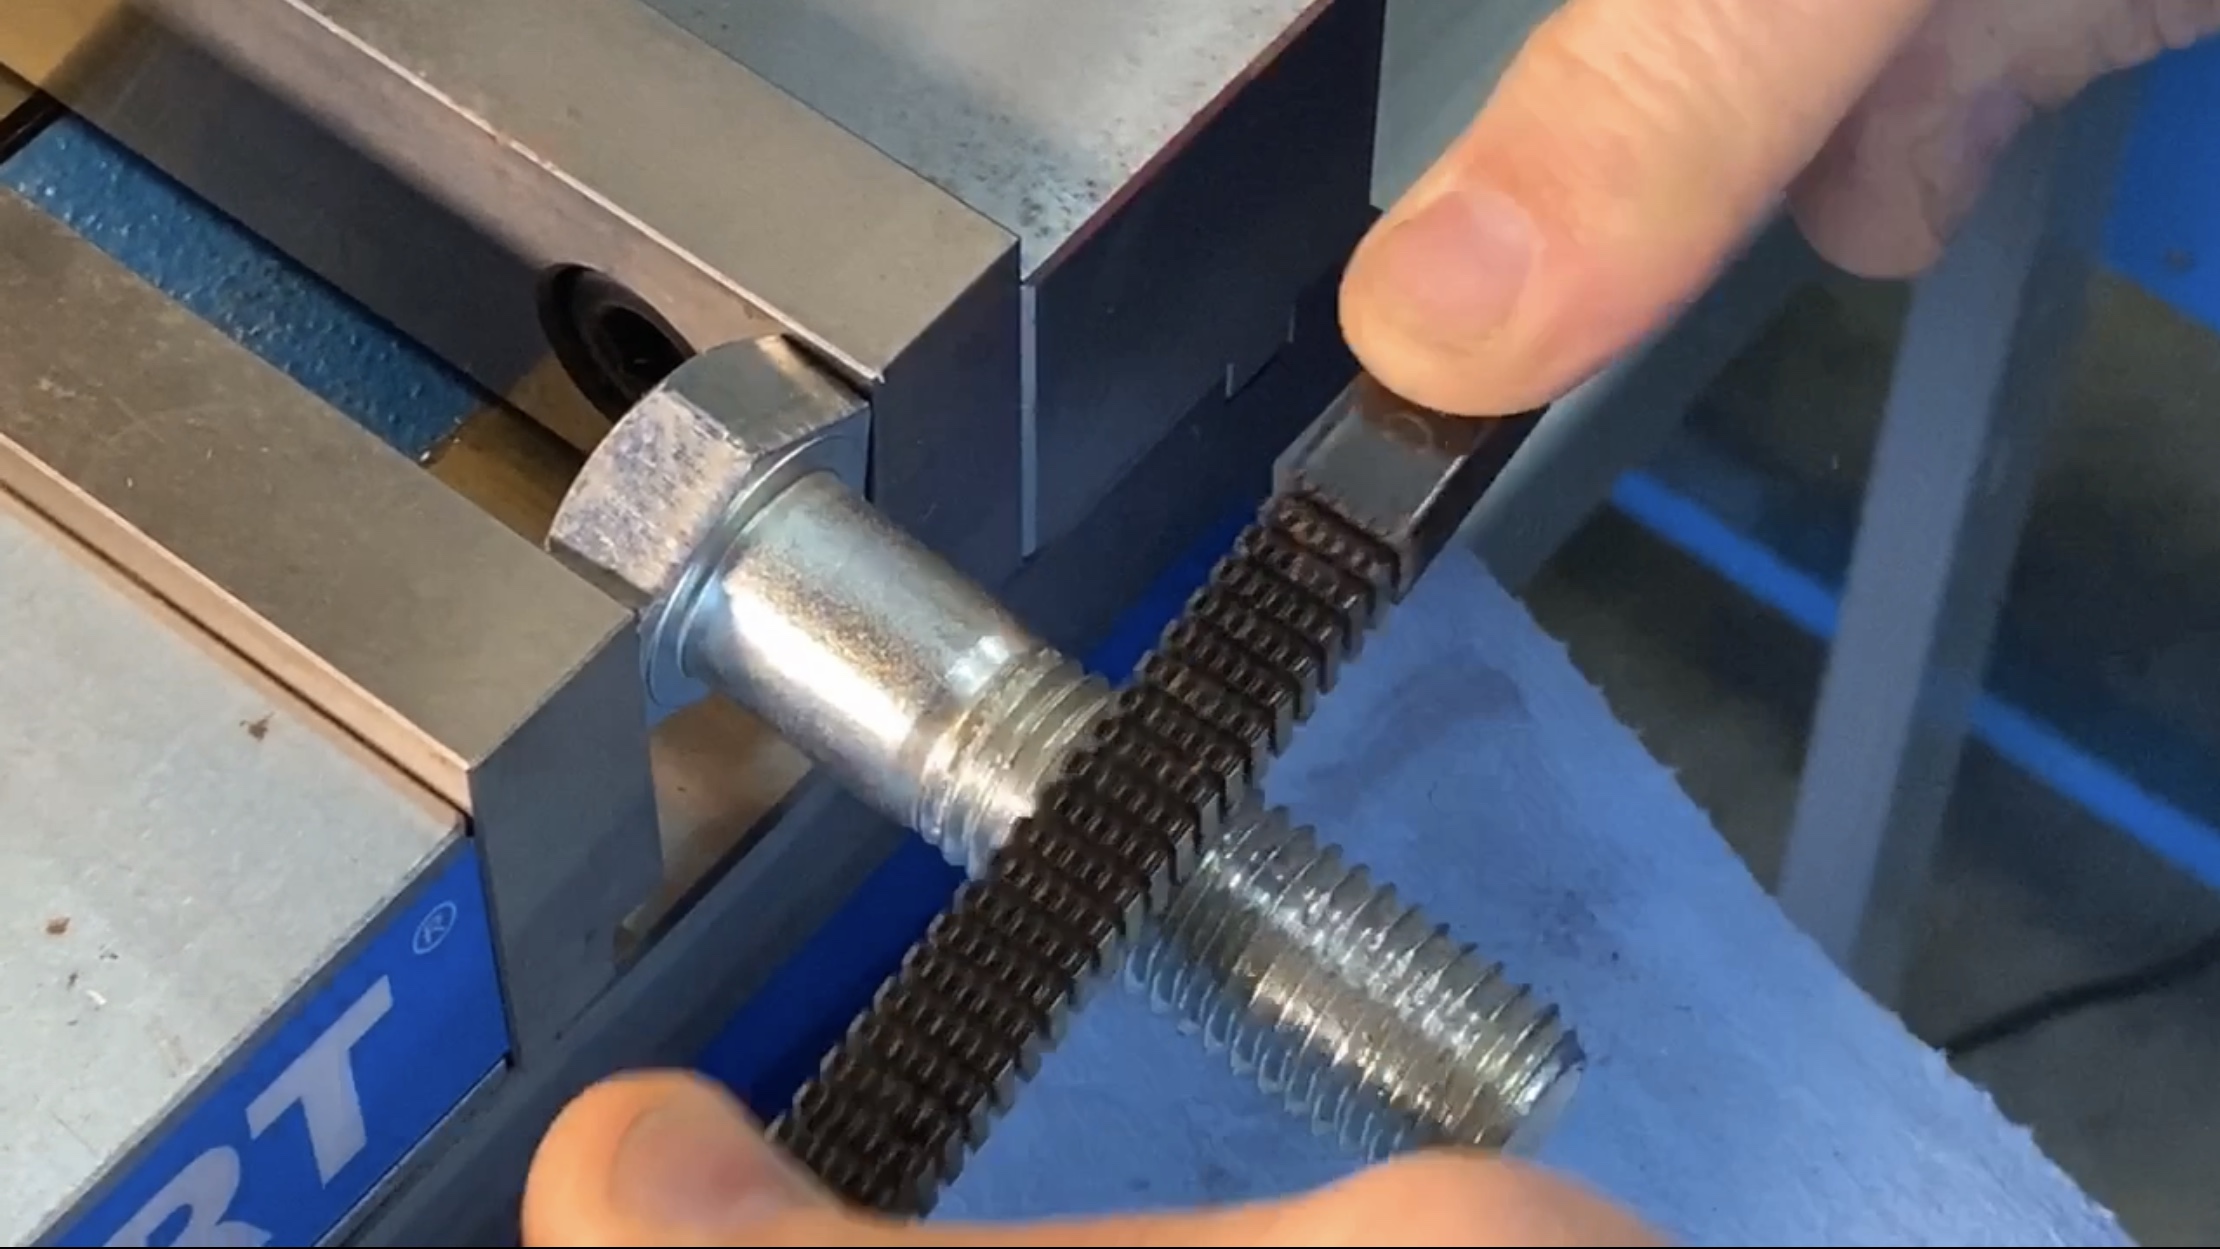
Repairing with Tap and Die
- Selecting the Correct Tap or Die: Choose a tap or die that matches the thread size and pitch of the damaged fastener. Verify the specifications using a thread gauge.
- Re-threading the Hole or Bolt: Apply cutting fluid to the tap or die to facilitate smooth cutting. For an internal thread, insert the tap into the hole and turn it slowly to cut new threads. For an external thread, use the die to re-cut the threads on the bolt. Turn the die gradually and consistently to avoid misalignment.
- Cleaning and Lubricating the New Thread: After re-threading, clean the area to remove any metal shavings. Apply a small amount of lubricant to the new threads to ensure smooth operation.
Finishing Up
- Final Inspection: Inspect the repaired thread to ensure it is properly aligned and free of debris. The new threads should appear clean and well-formed.
- Applying Thread Locker (if needed): For fasteners that are subject to vibration or high stress, consider applying a thread locker to secure them. Follow the manufacturer's instructions for proper application.
- Reassembling Components and Testing: Reassemble the components and test the repaired thread under normal operating conditions. Ensure the fastener holds securely and functions as expected.
Enhance your understanding of thread repair techniques by watching this informative YouTube video: Thread Repair Techniques. Source: YouTube, 'SubaruONLY' channel.
What are the common causes of thread damage?
Thread damage commonly occurs due to over-tightening, cross-threading, and corrosion. Over-tightening stretches or breaks the threads, cross-threading misaligns them, and corrosion weakens the material.
How can I identify damaged threads?
Damaged threads can be identified by difficulty in screwing or unscrewing fasteners, loose fitting, and visible wear or deformation.
What is a helicoil, and when should I use it?
A helicoil is a type of thread insert used to repair stripped or damaged threads. It is especially useful for internal threads where re-tapping is necessary. Use a helicoil when the existing thread is too damaged to be restored with a tap alone.
Can I repair external threads on a bolt or screw?
Yes, external threads on bolts or screws can be repaired using a die. Select the correct die for the thread size and pitch, then re-cut the threads using the die.
How do I avoid over-tightening fasteners?
To avoid over-tightening, use a torque wrench to apply the recommended torque for the specific fastener. Refer to the manufacturer’s specifications for proper torque settings.
Thread repair is a valuable skill that can save both time and money. By following this step-by-step guide, you can confidently address common thread issues and extend the life of your items. Regular maintenance and proper repair techniques are essential for ensuring the longevity of threaded fasteners.
Click on the following link to read another blog post: How To Change Fog Lamp Bulbs: A Comprehensive Guide


How To Change Engine Mounts?
How To Pick A Suitable Fire-Resistant Racing Suit?

How to Get Rid of Mold in Car
How Does A Turbo Wastegate Work?
How To Open A Square Drain Plug Without A Square Socket?

A Beginner's Guide to Car Maintenance

A Comprehensive Guide on How to Check Oil Pressure in Your Vehicle

How To Unlock Your Steering Wheel


