
How To Use Taps And Dies To Create Theats?
Discover the art of threading with taps and dies. Learn expert techniques for creating precise threads effortlessly.

When you shop through retailer links on our site, we may earn affiliate commissions. Learn more
Taps and dies are essential components of machining, enabling the creation of precise threaded surfaces vital for diverse mechanical applications. Taps form internal threads, while dies shape external threads, facilitating the secure fastening of components. Understanding their roles and selecting the appropriate tools empowers craftsmen and engineers to execute threading operations with precision.
Keep reading to delve deeper into the world of threading and gain valuable insights for your machining endeavors.
IN THIS ARTICLE
What Purpose Does A Tap Serve?What Role Does A Die Play?
How To Use A Tap?
How To Use A Die?
Criteria for Selecting Tap and Die Sets
FAQs
Final Thoughts
What Purpose Does A Tap Serve?
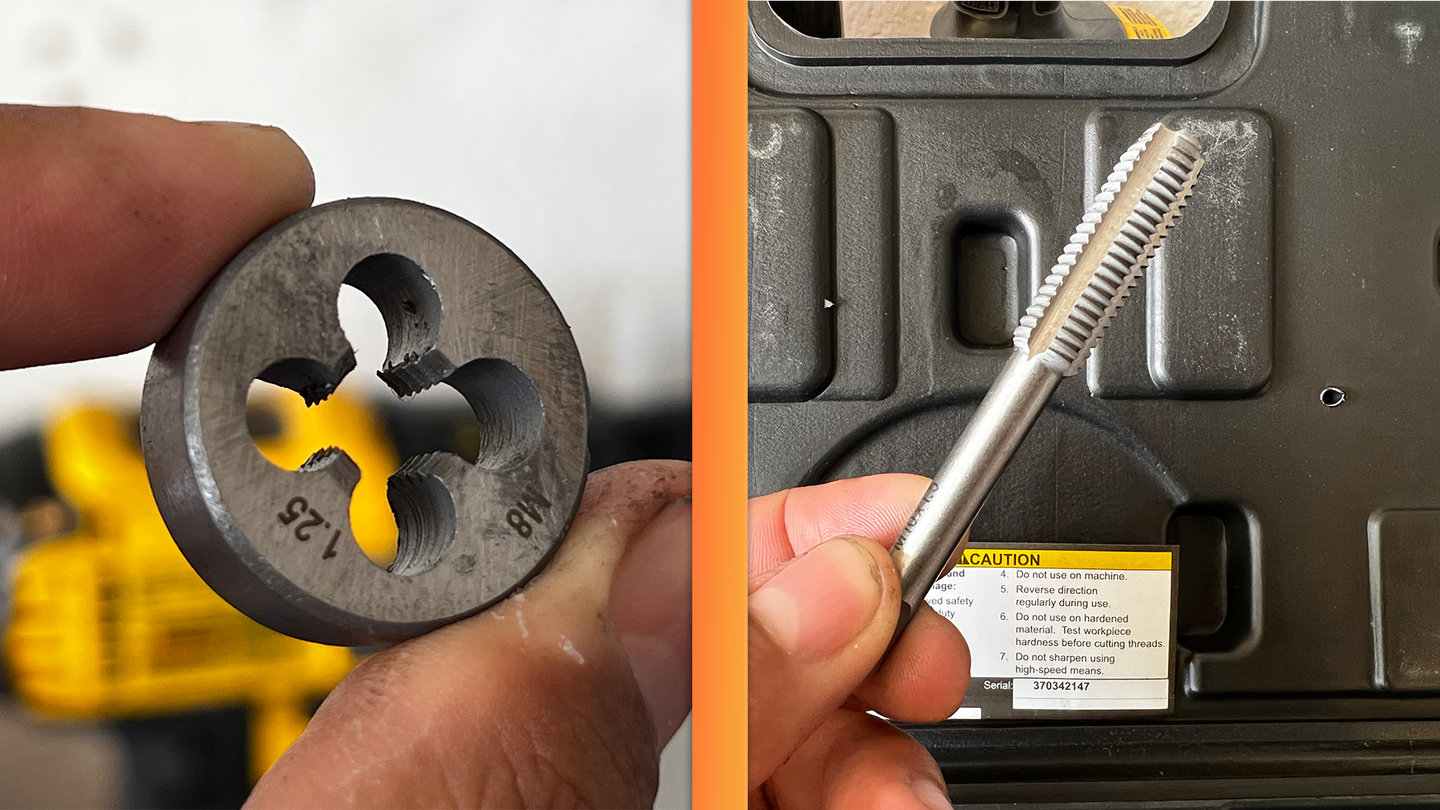
A tap is utilized to create internal threads within a hole, resulting in a threaded surface where a bolt can be securely fastened. Among the various types available, spiral-pointed and spiral-fluted taps are commonly employed. Spiral-point taps feature straight flutes for efficient coolant distribution and utilize an angular design at the cutting chamfer to manage chips effectively. Conversely, spiral-fluted taps evacuate chips from the hole with their spiral configuration.
Related Articles
What Role Does A Die Play?
Dies are instrumental in forming external threads on a rod, establishing a threaded surface for bolt fastening. Tailored to specific rod diameters and thread pitches, a die is applied to achieve the desired thread sizes. By utilizing a round die fixed within a die stock, external threads are manually cut. These round dies possess multiple cutting edges and intervening cavities for chip removal during the threading process.
How To Use A Tap?
While manual tapping is predominant, power taps like the spiral point plug tap operate electrically. Additionally, tapping can be automated using lathe machines, radial drilling machines, bench-type drill machines, and similar workshop apparatuses. Focusing on manual tapping, the process comprises several sequential steps outlined below:
Prepare the hole:
- Initiate tapping by drilling a hole with a diameter slightly smaller than the tap's outer diameter, termed the tap drill size.
- Consult the drill and tap chart, typically found within tap and die sets or machine shops, to select the appropriate drill bit for the hole diameter.
- Drill either a blind hole or a through-hole, ensuring the removal of all generated chips.
- Select Tap and Ratchet:
- Refer to the chart again to ascertain the suitable tap size for the project, considering different tap types; commence with a tapered tap, if necessary, before transitioning to a plug tap.
- Choose the appropriate ratchet based on the tap size, as larger ratchets exert excessive force on smaller taps, risking breakage.
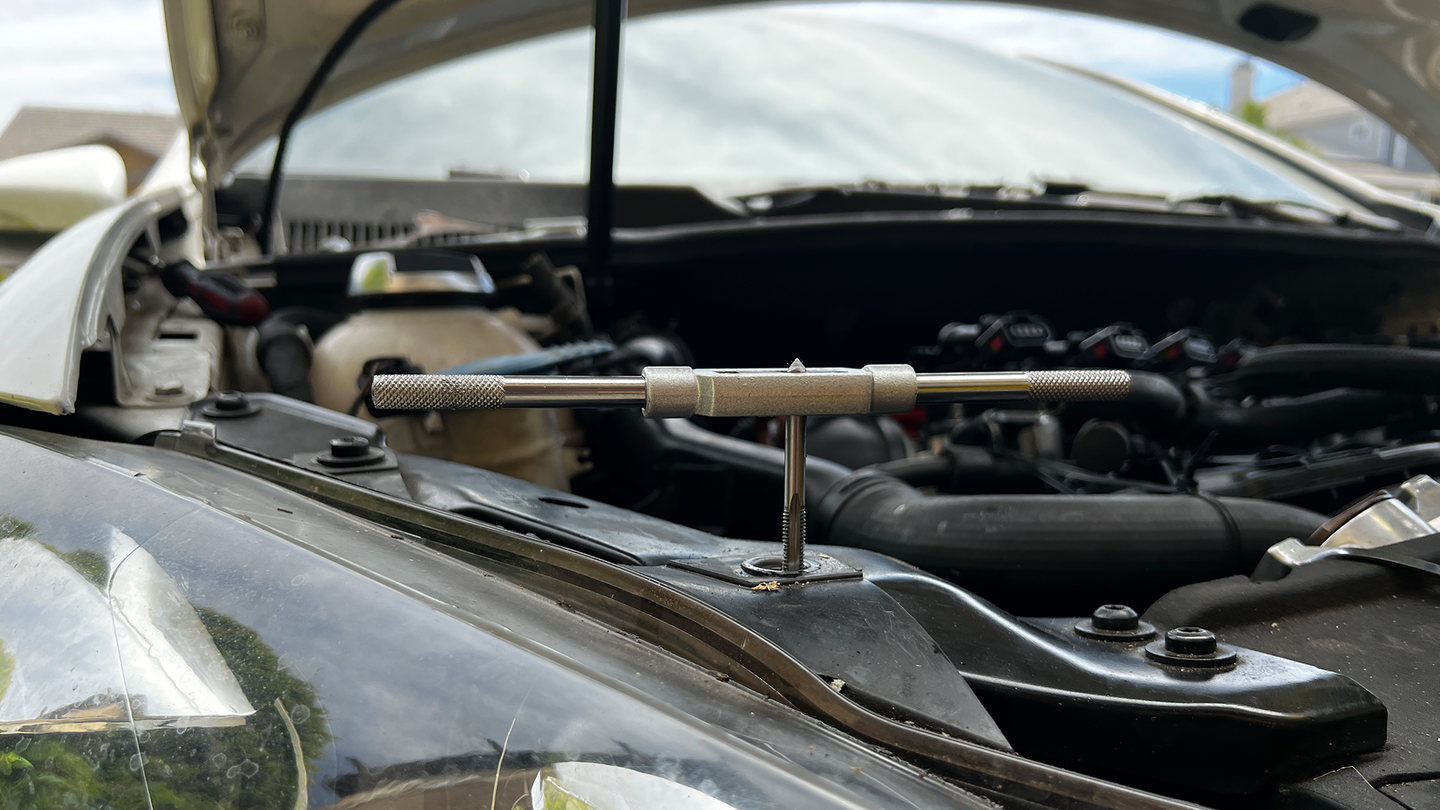
Thread Creation (Hand Tap):
- Secure the material to be threaded using a vice or clamp.
- Insert the tap, ensuring alignment and centrality, and rotate clockwise for two complete revolutions, followed by a half-cycle anticlockwise. Repeat until threading is complete, preventing damage to new threads from broken material.
- Apply cutting fluid throughout to mitigate heat and facilitate chip removal.
- Maintain the material's centrality and levelness during the process.
- If encountering resistance, rotate anticlockwise for half a revolution before retrying to avoid tap breakage or erroneous threads.
- Remove the tap by turning the ratchet anticlockwise until fully disengaged, signifying completion of the tapping process.
- For further insight into threads, explore our articles on thread design and standards.
How To Use A Die?
The threading process with a die entails several sequential steps, as detailed below:
Prepare the rod:
Begin by ensuring that the material's diameter is marginally smaller than the major diameter of the die. The die features a chamfered side serving as the entry point for the rod, aiding in centering and reducing initial turning force during threading.
Select Die and Wrench:
Similar to the tapping procedure, consult the chart to select the appropriate die size and pair it with a wrench of suitable dimensions.
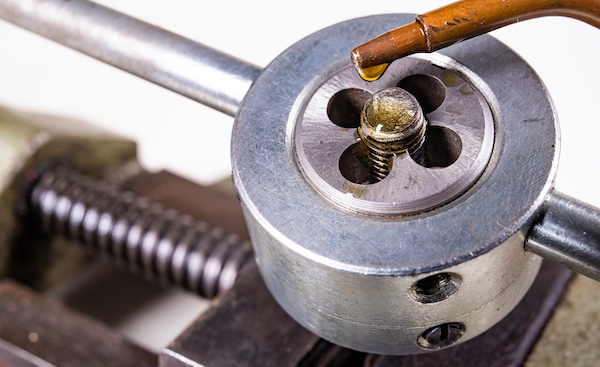
Thread Creation:
Secure the material using a vice or clamp.
Position the die on the material, commencing threading with the chamfered side. Align the die and center it, rotating clockwise for two complete revolutions, followed by a half-cycle anticlockwise. Repeat until threading is complete, employing cutting fluid as necessary.
Die Removal:
Turn the wrench anticlockwise until the die is entirely disengaged, indicating the conclusion of the threading process.
Criteria for Selecting Tap and Die Sets
Several factors should be taken into account when determining the appropriate tap and die set to utilize. The following are key considerations:
Material: While high-speed steel is pricier than hardened carbon steel, it offers enhanced durability and compatibility with a broader range of materials.
Quantity and Variety of Pieces: Ensure that the set includes sizes within the required range for the intended threading tasks.
Additional Accessories: Some sets may incorporate supplementary tools and reference charts, enhancing their utility and convenience.
Corrosion Resistance: Evaluate whether the set components possess resistance to corrosion, particularly if they will be utilized in corrosive environments.
Application and Material Compatibility: Refer to the manufacturer's product information to ascertain the suitability of the set for specific applications and materials.
Case Durability: Assess the durability of the carrying case, as it serves as storage for the set components, safeguarding them from damage and loss.
FAQs
Can taps and dies be interchanged?
No, taps create internal threads, while dies create external threads. Interchanging them can damage both the workpiece and the tools.
Are there taps and dies for different materials?
Yes, materials like high-speed steel or carbide cater to different workpiece materials, from standard metals to harder ones like stainless steel or titanium.
What safety measures should I take?
Wear safety gear, secure workpieces, use cutting fluid for lubrication, and handle tools with care to prevent accidents.
Final Thoughts
In conclusion, taps and dies play vital roles in machining, offering precise threading solutions for various applications. Proper understanding of their usage, along with careful selection based on material and other criteria, ensures successful threading operations.
Click on the following link to read another blog post: How To Get Better Gas Mileage?


.png "best way to get bird poop off car")