
How To Change Fog Lamp Bulbs: A Comprehensive Guide
Learn how to change fog lamp bulbs with our step-by-step guide. Ensure your car's safety and visibility in poor weather with our comprehensive instructions and tips.

When you shop through retailer links on our site, we may earn affiliate commissions. Learn more
Driving in foggy conditions can be hazardous, and having functional fog lamps is crucial for ensuring your safety and visibility on the road. Fog lamps, positioned low on your vehicle, help illuminate the road directly in front of you, cutting through dense fog, rain, or snow. Over time, these bulbs can dim or burn out, necessitating a replacement. Fortunately, changing fog lamp bulbs is a manageable task that can save you a trip to the mechanic.
In this guide, we'll walk you through everything you need to know to change your fog lamp bulbs quickly and efficiently, ensuring your car remains safe and roadworthy.
IN THIS ARTICLE
Understanding Lamp BulbsWhen Should You Change Fog Lamp Bulbs?
Prepare To Change Fog Lamp Bulbs.
Step-By-Step Guide To Change Fog Lamp Bulbs
Safety Tips For Changing Fog Lamp Bulbs
FAQs
Final Thoughts
Understanding Lamp Bulbs
Step 1: Access the Fog Lamp Housing
- 1. Consult the Owner’s Manual: Before starting, refer to your vehicle’s owner’s manual for specific instructions on accessing the fog lamp housing.
- 2. Remove the Underbody Cover: Some cars have an underbody cover that protects the fog lamp housing. Use a screwdriver to remove this cover.
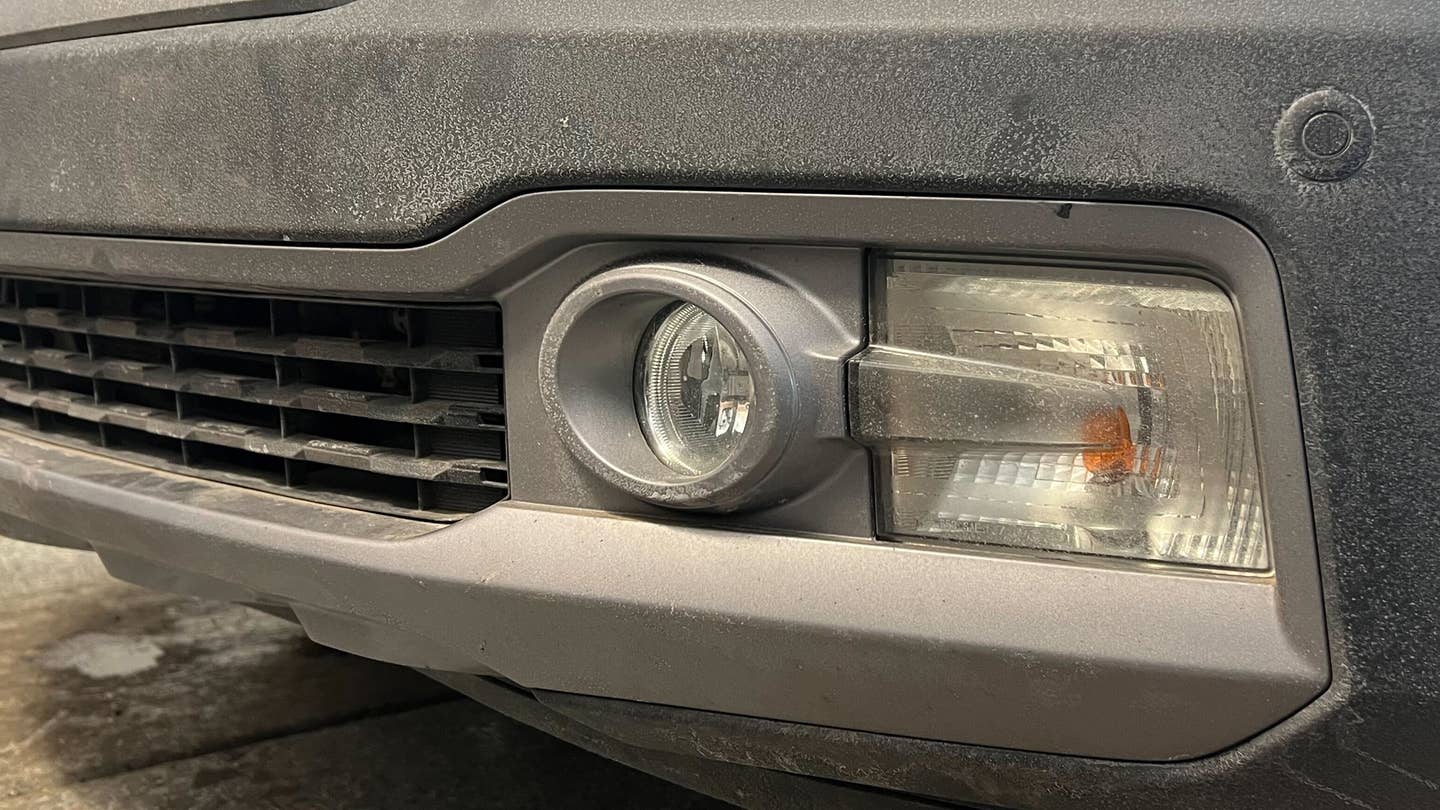
- 3. Locate the Fog Lamp Housing: Find the fog lamp housing by looking at the front of your car. It’s usually located near the bumper.
Step 2: Remove the old bulb
- 1. Disconnect the Power Connector: Carefully disconnect the power connector from the back of the fog lamp. This usually involves pressing a tab and pulling the connector out.
- 2. Remove the bulb: Twist the bulb counterclockwise to release it from the housing. Be gentle to avoid breaking the bulb.
Step 3: Install the New Bulb
- 1. Handle the Bulb with Care: Wear latex gloves to prevent oils from your skin from transferring to the new bulb. This can cause the bulb to overheat and burn out prematurely.
- 2. Insert the new bulb: Align the new bulb with the socket and twist it clockwise until it’s securely in place.
- 3. Reconnect the Power Connector: Attach the power connector to the new bulb.
Step 4: Test the New Bulb
- 1. Turn on the fog lamps: Switch on your car’s fog lamps to ensure the new bulb is working correctly.
- 2. Check the alignment: Ensure the light is properly aligned. If necessary, adjust the bulb to achieve the correct beam pattern.
Step 5: Reassemble and Finish
- 1. Reattach the Underbody Cover: If you removed an underbody cover, reattach it using the screws you set aside.
- 2. Final Inspection: Give everything a final check to ensure all components are secure and properly in place.

Related Articles
When Should You Change Fog Lamp Bulbs?
Several signs indicate that it’s time to change your fog lamp bulbs:
- Reduced Light Output: If you notice that your fog lamps are not as bright as they used to be, it may be time for a replacement.
- Flickering Lights: Flickering fog lights can indicate that the bulb is nearing the end of its life.
- Burned-Out Bulb: If one or both of your fog lamps are not working at all, the bulbs have likely burned out and need replacing.
Prepare To Change Fog Lamp Bulbs.
Before you start the replacement process, gather the necessary tools and materials:
- New fog lamp bulbs (make sure they are the correct type for your vehicle).
- Owner’s manual (for specific instructions and bulb type)
- Screwdriver set
- Latex gloves (to avoid getting oil from your skin on the new bulbs)
- clean cloth
Ensure your car is parked on a flat surface, the engine is off, and the keys are removed from the ignition for safety.
Step-By-Step Guide To Change Fog Lamp Bulbs
Step 1: Access the Fog Lamp Housing
- 1. Consult the Owner’s Manual: Before starting, refer to your vehicle’s owner’s manual for specific instructions on accessing the fog lamp housing.
- 2. Remove the Underbody Cover: Some cars have an underbody cover that protects the fog lamp housing. Use a screwdriver to remove this cover.
- 3. Locate the Fog Lamp Housing: Find the fog lamp housing by looking at the front of your car. It’s usually located near the bumper.
Step 2: Remove the old bulb
- 1. Disconnect the Power Connector: Carefully disconnect the power connector from the back of the fog lamp. This usually involves pressing a tab and pulling the connector out.
- 2. Remove the bulb: Twist the bulb counterclockwise to release it from the housing. Be gentle to avoid breaking the bulb.
Step 3: Install the New Bulb
- 1. Handle the Bulb with Care: Wear latex gloves to prevent oils from your skin from transferring to the new bulb. This can cause the bulb to overheat and burn out prematurely.
- 2. Insert the new bulb: Align the new bulb with the socket and twist it clockwise until it’s securely in place.
- 3. Reconnect the Power Connector: Attach the power connector to the new bulb.
Step 4: Test the New Bulb
- 1. Turn on the fog lamps: Switch on your car’s fog lamps to ensure the new bulb is working correctly.
- 2. Check the alignment: Ensure the light is properly aligned. If necessary, adjust the bulb to achieve the correct beam pattern.
Step 5: Reassemble and Finish
- 1. Reattach the Underbody Cover: If you removed an underbody cover, reattach it using the screws you set aside.
- 2. Final Inspection: Give everything a final check to ensure all components are secure and properly in place.
For a visual demonstration on how to change fog lamp bulbs, you can refer to this helpful YouTube video: How to Change Fog Light Bulbs. Source: YouTube, '1A Auto: Repair Tips & Secrets Only Mechanics Know' channel.
Safety Tips For Changing Fog Lamp Bulbs
Changing fog lamp bulbs involves working with electrical components and delicate parts. Here are some safety tips to keep in mind:
- Turn Off the Engine: Always make sure the engine is off and the keys are removed from the ignition before starting.
- Avoid hot bulbs: Allow the bulbs to cool down before handling them to avoid burns.
- Use Gloves: Wear latex gloves to prevent oils from your skin from getting on the new bulbs.
- Handle with Care: Be gentle with the bulbs to avoid breaking them, which can cause injury.
FAQs
How long do fog lamp bulbs typically last?
The lifespan of fog lamp bulbs varies depending on the type. Halogen bulbs last around 1-2 years, LED bulbs can last up to 5 years, and HID bulbs can last 3-5 years.
Can I upgrade my fog lamp bulbs to a different type?
Yes, you can upgrade to a different type of bulb, such as switching from halogen to LED, but make sure the new bulbs are compatible with your vehicle.
Do I need to replace both fog lamp bulbs at the same time?
It’s a good practice to replace both bulbs simultaneously to ensure even lighting and to avoid having to repeat the process shortly after.
What should I do if the new bulb doesn’t work?
Double-check the connections and make sure the bulb is properly seated in the socket. If it still doesn't work, try testing the bulb on the other fog lamp housing to see if the issue lies with the bulb itself or the electrical connection
Final Thoughts
Changing your fog lamp bulbs is an essential maintenance task that enhances your vehicle's safety and performance during poor weather conditions. By understanding the types of bulbs, recognizing when they need to be changed, and following a clear, step-by-step process, you can ensure your fog lamps are always in top condition. Regularly checking and replacing your fog lamp bulbs not only provides better visibility but also ensures compliance with road safety standards. Whether you choose halogen, LED, or HID bulbs, selecting the right type and handling the installation with care will help you maintain optimal lighting and safe driving. Happy driving!
Click on the following link to read another blog post: Mastering Thread Repair: A Step-By-Step Guide For DIY Enthusiasts


