
How to Bleed Your Brakes
Learn how to bleed your brakes all on your own with this step-by-step guide. Get the most out of your car's braking system with these easy tips!

When you shop through retailer links on our site, we may earn affiliate commissions. Learn more
Do you hear a squealing noise coming from your brakes? Well, that’s a sure sign that it’s time to bleed them. Bleeding your brakes is an important part of vehicle maintenance and can be done fairly easily at home. In this blog post, we will discuss why it’s necessary to bleed brakes routinely and walk through the step-by-step process of how to safely and correctly bleed your brakes at home with minimal tools or experience required. So if you are noticing any strange noises when pressing down on the brake pedal or if it feels spongy when trying to stop, get ready for some DIYcarousing!
IN THIS ARTICLE
What is Brake Bleeding and Why is it Necessary?Common Issues When Bleeding Brakes
Step-by-Step Guide to Bleeding Your Brakes
Tips for Maintaining Your Brakes After Bleeding
FAQs
What is Brake Bleeding and Why is it Necessary?
Brake bleeding is a crucial maintenance procedure for any vehicle, as it ensures the reliability and safety of its braking system. Over time, air can infiltrate the brake lines, causing a soft or spongy brake pedal, while moisture and contaminants can compromise brake fluid integrity, potentially leading to corrosion and reduced stopping power.
Brake bleeding effectively purges air, moisture, and old brake fluid from the system, resulting in responsive brakes that stop the vehicle quickly and predictably. This process not only enhances safety but also extends the lifespan of brake components and maintains the overall performance of the braking system. For any responsible vehicle owner, regular brake bleeding is a fundamental aspect of vehicle maintenance that should not be overlooked.
Related Articles
Common Issues When Bleeding Brakes
Brake bleeding is a crucial maintenance task, but it can sometimes be challenging due to various issues that may arise during the process. Here are some common problems and issues encountered when bleeding brakes:
-
Air Trapped in the System: The most common issue during brake bleeding is failing to remove all air bubbles from the brake lines. Air trapped in the system can cause a spongy or soft brake pedal and reduced braking performance.
-
Inadequate Bleeding Sequence: Brakes should be bled in a specific order, typically starting from the wheel farthest from the master cylinder and working your way towards the closest. An incorrect sequence can result in incomplete air removal.
-
Loose Bleeder Valve: If the bleeder valve is not securely tightened after bleeding, it can allow air to re-enter the system or cause brake fluid to leak.
-
Contaminated Brake Fluid: Using contaminated or old brake fluid can introduce debris and moisture into the system, leading to corrosion and brake performance issues.
-
Over-Bleeding: Over-bleeding brakes can lead to an excessive loss of brake fluid and result in a dangerously low fluid level in the master cylinder.
-
Faulty Brake Master Cylinder: If the master cylinder has internal leaks or is malfunctioning, it can hinder the brake bleeding process and lead to persistent air in the system.
-
Damaged Brake Lines or Components: Brake lines or components with cracks, holes, or deteriorated seals can introduce air or fluid leaks into the system.
-
Inadequate Bleeding Tools: Using improper bleeding tools or equipment can make it difficult to create a proper seal and maintain the required pressure during bleeding.
-
Improper Brake Fluid Type: Using the wrong type of brake fluid can lead to compatibility issues, potentially damaging rubber seals and components.
-
Caliper or Wheel Cylinder Issues: Problems with the calipers or wheel cylinders, such as damaged seals or pistons, can impede the removal of air and proper fluid flow during bleeding.
-
Master Cylinder Reservoir Contamination: A dirty or contaminated master cylinder reservoir can introduce debris into the brake fluid, affecting brake performance.
-
Insufficient Brake Fluid Supply: Running out of brake fluid during the bleeding process can introduce air into the system and require restarting the procedure.

Step-by-Step Guide to Bleeding Your Brakes
Here's a List of Essential Tools and Materials:
-
A jack and jack stands
-
A lug wrench or socket set
-
Brake fluid (check your vehicle's specifications for the correct type)
-
A clear plastic hose
-
A brake bleeder wrench or a combination wrench that fits your bleeder valve
-
A catch container (a clear plastic bottle works well)
-
A helper (optional but recommended)
Step 1: Safety First
Always prioritize safety. Ensure your vehicle is on a level surface, engage the parking brake, and wear safety glasses and gloves. Also, have a fire extinguisher nearby, as brake fluid is flammable.
Step 2: Locate the Brake Bleeder Valve
Identify the brake bleeder valve on each wheel. Typically, there's one at each wheel cylinder or caliper. They look like small screws or nipples and are usually covered with a rubber cap.
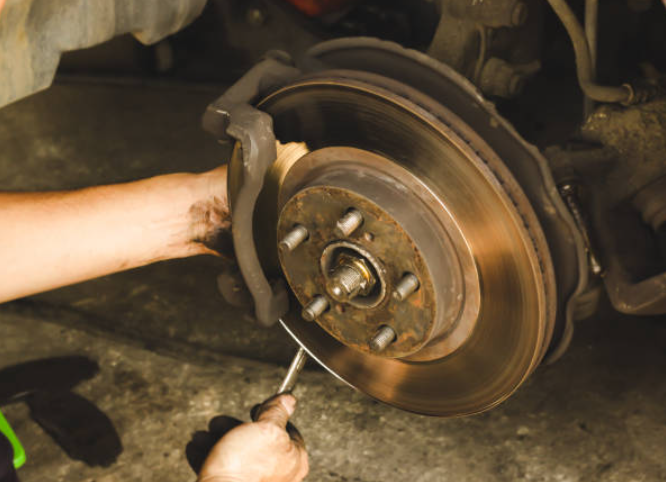
Step 3: Prepare the Vehicle
Using the lug wrench or socket set, remove the wheel on the brake you intend to bleed. This gives you access to the brake components.
Step 4: Check and Fill the Brake Fluid Reservoir
Locate the brake fluid reservoir under the hood. Check the fluid level and ensure it doesn't go below the minimum level during the bleeding process. If necessary, add brake fluid to the reservoir.
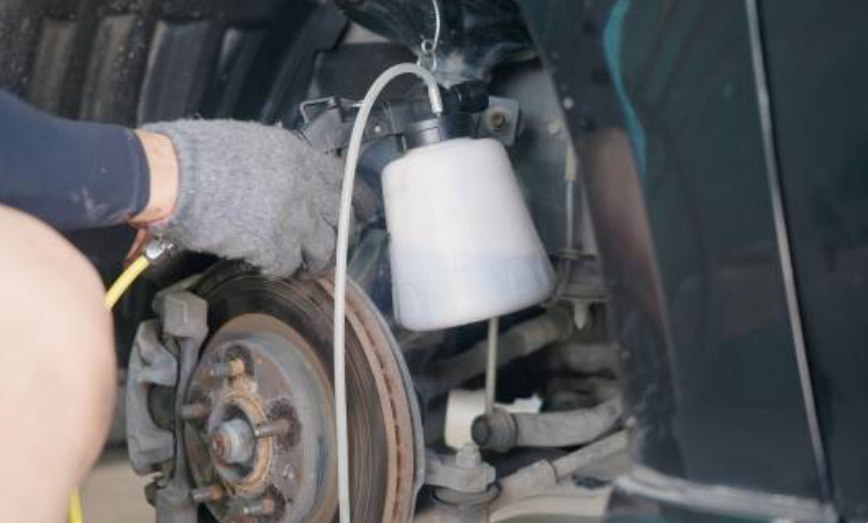
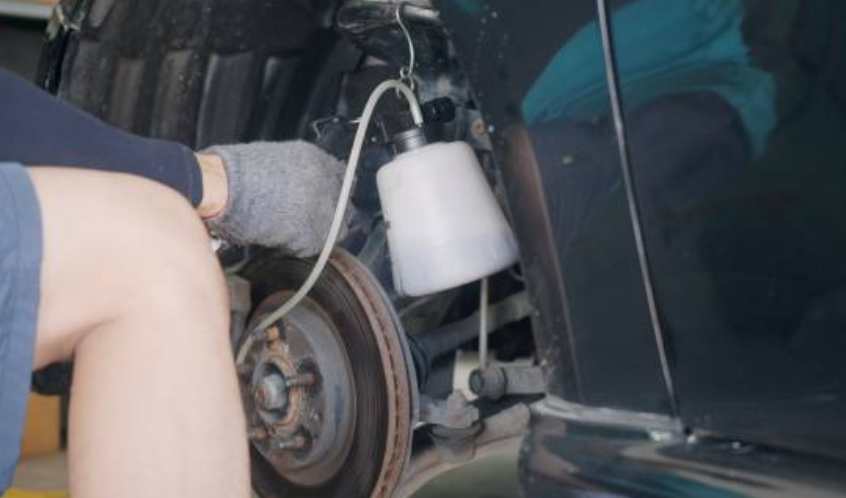
Step 5: Attach the Hose and Catch Container
Connect one end of the transparent plastic hose to the brake bleeder valve and position the opposite end inside the catch container. Make sure the hose is immersed in a small quantity of brake fluid to prevent any air from entering the brake system.
Step 6: Bleed the Brake
With the help of a friend or by yourself (if your vehicle allows for one-person bleeding), follow these steps:
-
Open the bleeder valve by turning it counterclockwise about a quarter turn.
-
Have your helper slowly depress the brake pedal until it reaches the floor and then hold it down firmly.
-
While maintaining the brake pedal in the depressed position, carefully monitor the brake fluid flowing through the hose. Initially, you may notice the presence of air bubbles, but these should cease as the brake pedal remains held down firmly.
-
Close the bleeder valve by turning it clockwise.
-
Release the brake pedal slowly.
Step 7: Repeat the Process
Repeat steps 6(1) to 6(5) until there are no more air bubbles in the brake fluid exiting the hose. Typically, this requires bleeding each wheel's brake cylinder or caliper in a specific order (check your vehicle's manual).
Step 8: Check Brake Fluid Level
After bleeding all the brakes, check the brake fluid reservoir again and top it off if needed.
Step 9: Reassemble and Test
After reassembling the wheel and securely tightening the lug nuts, proceed to replicate the same procedure for the remaining wheels. Once you've completed bleeding all the brakes, it's essential to conduct a test drive to verify that the brakes are functioning correctly and reliably.
Tips for Maintaining Your Brakes After Bleeding
Maintaining your brakes after bleeding is crucial for sustained safety and performance on the road. Regular inspections, monitoring brake fluid levels, and using high-quality brake fluid are fundamental steps. Additionally, keep a close eye on brake pads, rotors, and brake lines for wear or damage, and address any issues promptly.
Following manufacturer-recommended maintenance intervals for brake fluid changes and professional brake service when needed ensures that your brakes remain in optimal condition. Drive responsibly to minimize unnecessary wear and tear, and always be attentive to any unusual noises or changes in brake performance. By staying proactive and diligent in your brake maintenance efforts, you'll enjoy safe and reliable braking in your vehicle.
FAQs
-
Can I reuse the brake fluid I've removed during bleeding?
It's generally not recommended to reuse brake fluid that has been removed during bleeding, as it may be contaminated with air or impurities. Always use fresh, clean brake fluid when bleeding your brakes.
-
Can I bleed my brakes if I have no prior mechanical experience?
Brake bleeding can be performed by individuals with varying levels of mechanical experience. However, if you're unfamiliar with the process or feel uncertain, it's advisable to seek guidance from an experienced individual or a professional mechanic to ensure your safety and the effectiveness of the procedure.
Read more review here: Top 10 LED License Plate Lights


