How to Adjust a Carburetor: A Step-by-Step Guide
Step into our comprehensive guide on carburetor adjustment – a crucial expertise that can boost your vehicle's performance and spare you from needless visits to the mechanic. Whether you possess advanced do-it-yourself skills or you're a novice aiming to expand your knowledge of automobiles, this comprehensive guide is designed to lead you through the intricacies of fine-tuning your carburetor from the convenience of your home. Let's delve into the nuances of this indispensable maintenance task.

What is a Carburetor?
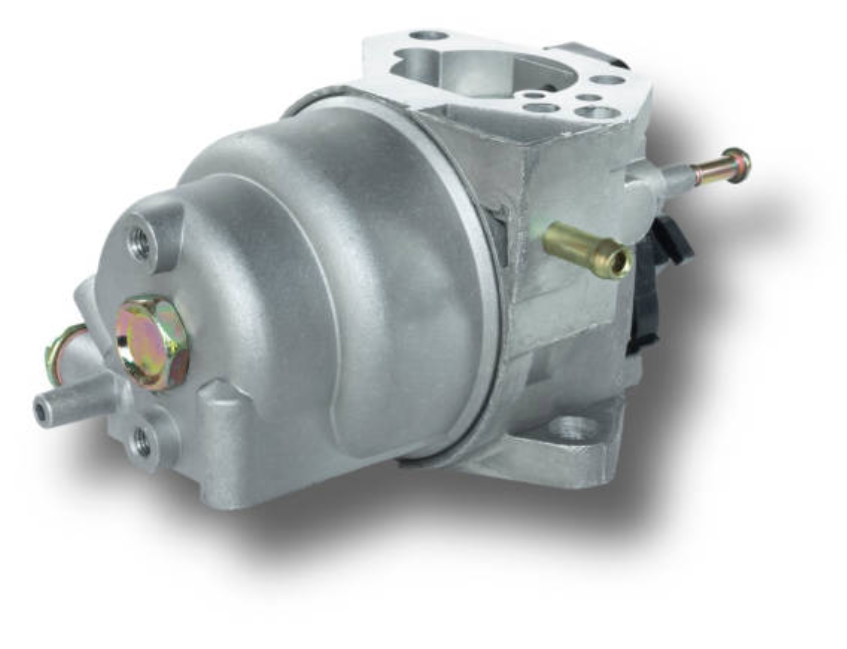
A carburetor serves as a mechanical apparatus that blends air and fuel in precise proportions for combustion within an internal combustion engine. Functioning like a tube, it facilitates the entry of air and fuel into the engine through valves, adjusting their mixture to accommodate diverse driving conditions.
The carburetor fulfills multiple roles:
- It blends gasoline and air to form a highly combustible mixture.
- It governs the ratio of air to fuel.
- It manages the engine's speed.
During acceleration, the throttle opens, permitting more air and fuel into the engine. Conversely, during deceleration, the throttle closes, diminishing the inflow of air and fuel. The carburetor assumes responsibility for maintaining this delicate equilibrium, ensuring the engine operates smoothly across a spectrum of conditions.

Before commencing the carburetor adjustment, ensure you have the essential tools at hand. Prepare a flat-head screwdriver, a wrench set, and, if your vehicle lacks one, a tachometer. Additionally, consider acquiring a carburetor cleaner spray for a thorough carburetor cleaning before making adjustments.
Step 1: Locate the Carburetor
Begin by identifying the carburetor in your vehicle. Typically found near the engine's top, it resembles a compact metal box with multiple attached tubes. The specific location may vary by vehicle model, so consult your owner's manual if needed.
Step 2: Clean the Carburetor
Before adjusting, it's prudent to clean the carburetor meticulously. Apply carburetor cleaner spray both externally and internally, allowing it to sit for a few minutes before wiping it off with a clean rag.
Step 3: Warm Up the Engine
Initiate your vehicle and let it run for a few minutes to bring the engine to operating temperature. Carburetor adjustments are most effective when performed under these conditions.
Step 4: Adjust the Idle Speed Screw
Find the idle speed screw positioned on the side of the carburetor. Use your screwdriver to turn the screw clockwise until the engine begins to slow down. Subsequently, turn the screw counterclockwise until the idle speed increases. To determine the ideal idle speed specific to your vehicle, refer to your owner's manual.
Step 5: Adjust the Mixture Screw
Locate the mixture screw, often near the carburetor's base. Turn the screw clockwise until the engine stutters, then gradually turn it counterclockwise until smooth operation is restored.
Step 6: Test the Adjustment
Following the adjustment of the screws, embark on a test drive to evaluate any enhancements in performance.

-
What if I don't have a tachometer?
Although a tachometer aids in precise adjustments, basic carburetor adjustments can still be accomplished without one. Carefully tune the idle speed and mixture screws, relying on the engine's sound and performance observations throughout the process.
-
Can I over-adjust my carburetor?
Certainly, excessive adjustment of the carburetor can lead to issues such as decreased fuel efficiency, rough idling, and challenges in starting the engine. To prevent over-tuning, adhere to the manufacturer's recommended standards and guidance provided in your owner's manual.
See another article here: Top 10 Transmission Coolers For Peak Performance


