
How to Replace a CV Axle
Replacing a CV axle is not as hard as you think. Follow these step-by-step instructions and save yourself time and money from having to pay for a professional repair!

When you shop through retailer links on our site, we may earn affiliate commissions. Learn more
The constant velocity (CV) axles of your vehicle are essential components responsible for the seamless and efficient transfer of power from the transmission to the wheels. As these axles undergo wear over time, various issues such as clicking sounds, vibrations, or potential failure may arise. Acquiring the knowledge of replacing a CV axle is a valuable skill for car enthusiasts and DIYers alike. This thorough guide will guide you through a step-by-step process, empowering you to confidently undertake this task and ensure the continued smooth operation of your vehicle's wheels.
Understanding CV Axles
Before embarking on the detailed steps of CV axle replacement, it's essential to grasp the fundamental role of a CV axle. The Constant Velocity (CV) axle, often referred to as a half-shaft, stands as a pivotal component within your vehicle's drivetrain. This axle serves the critical function of transferring power from your engine to your wheels, essentially enabling your car to move with efficiency and smooth operation. Understanding the significance of this component lays the groundwork for appreciating the importance of proper maintenance and, when necessary, the skillful replacement of a CV axle.

Related Articles
Steps to Replace a CV Axle
Tools and Materials Needed:
- Jack and jack stands
- Lug wrench
- Prying bar
- Needle-nose pliers
- Axle nut socket
- Breaker bar
- Screwdriver
- Hammer
- New CV axle
- Torque wrench
Step 1: Gather the Tools and Materials
Prior to starting, ensure you have the essential tools and materials on hand. This typically involves a jack and jack stands, lug wrench, needle-nose pliers, breaker bar, screwdriver, hammer, axle nut socket, and, of course, a replacement CV axle.
Step 2: Ensure Safety First
Prioritize safety. Park your vehicle on a flat surface, don your safety gear, and loosen the lug nuts on the wheel you are about to work on.
Step 3: Lift the Vehicle
Using a jack, carefully lift the front of your vehicle and secure it on jack stands. Ensure it is stable and won't tip or move during the replacement process.
Step 4: Remove the Wheel
Finish removing the lug nuts and take off the wheel to access the CV axle.
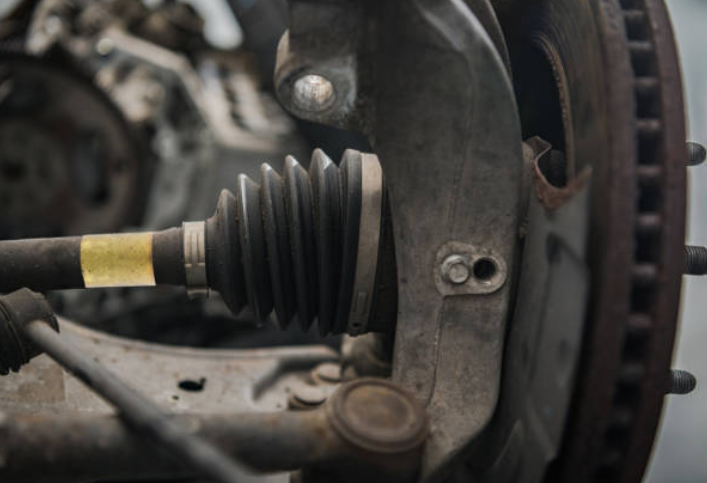
Step 5: Access the CV Axle
Locate the CV axle on the side you're working on. It connects the wheel hub to the transmission.
Step 6: Remove the Axle Nut
Use the breaker bar and axle nut socket to loosen and remove the axle nut. This nut secures the CV axle to the wheel hub.
Step 7: Detach ball joint or Strut
Depending on your vehicle, detach the ball joint or strut from the wheel hub. This may involve removing bolts or using a prying bar.
Step 8: Disconnect the CV Axle
Remove the cotter pin from the CV axle using needle-nose pliers. Loosen and remove the castle nut securing the ball joint or control arm to the hub. Gently separate the CV axle from the hub by tapping it with a hammer.
Step 9: Remove CV Axle from the Transmission
Inside the wheel well, use a screwdriver or pry bar to carefully separate the CV axle from the transmission.
Step 10: Install the New CV Axle
Insert the new CV axle into the transmission, ensuring it seats properly. Align the splines on the CV axle with those in the wheel hub and gently push it into place.
Step 11: Reconnect Components
Reattach the ball joint or strut to the wheel hub and secure it with the castle nut. Insert a new cotter pin through the hole in the castle nut to secure it.
Step 12: Tighten the Axle Nut
Torque the axle nut to the specifications mentioned in your vehicle's manual using a torque wrench.
Step 13: Reassemble and Test Drive
Reattach the wheel, lower the vehicle, and securely tighten the lug nuts. Conduct a test drive to verify that everything is functioning properly.
FAQs
-
Can I drive with a damaged CV axle?
It's not recommended to drive with a damaged CV axle for an extended period. Continued use may lead to further damage, potentially causing more extensive and expensive repairs. It's advisable to address CV axle issues promptly.
-
Is it necessary to replace both CV axles at the same time?
While it's not mandatory, it's often advisable to replace both CV axles simultaneously if one is worn or damaged. This ensures balanced performance and prevents the need for a second replacement shortly after the first.
Read more review here: The 10 Best AC Recharge Kits


_1668011646.png "how roll center affects your cars dynamics")
